Introduction to the Challenge

This challenge is specifically set towards those that have not had the opportunity to sew a garment/object by hand. This challenge is NOT a competion, merely a place for new handsewers to document their progress and seek feedback and help, and to challenge themselves. Sewers that are experienced in hand stitching items will not be excluded, but this is meant as a chance for those with no experience in this realm to get a start.The Challenge I propose is that all persons joining the challenge pick a garment or object of textile nature, no matter how small or large, i.e. a pilgrim bag, a Coif or any type of hat, socks, flag, gloves etc., and have at least one form of documentation for its existence during the SCA time period. Acceptable forms of documentation for this project will be paintings/woodcuts/drawings with the desired object in it or a picture of the desired object.The challenge starts first of June and will end one year later. People can join the challenge at any time during this year. Those of you with handsewing experience are invited to follow the blog, and leave comments and feedback as the challenge progresses. The challenge is based in Drachenwald, but is open to all kingdoms.
If you would like to join the challenge (and the blog) please email me at gottfriedkilianus@yahoo.com to be added!

Saturday, December 12, 2009

Let the Sewing Begin!

No more excuses!

My first time hand sewing project has left the research and preparation stage and has finally entered the actual construction stage! I was so excited at the prospect of starting the project for real that I had to take photos to mark the occasion. Here I am, November 29th, 2009 actually cutting out the project!


And later that same day I finally began hand sewing the pieces together!

My process for choosing the stitch for the first seams included reading through the “Reconstructing History Sewing Techniques of the Medieval Period” sewing guide by Kass McGann as well as receiving some instruction from my mentors, Estela and Christiana. McGann talks about the Running Stitch, the Back Stitch and the Whip Stitch. My first instincts told me to go with the back stitch, since this is a stitch my mother taught me a very long time ago. McGann explains that this stitch was used in underarm seams, sleeve attachments and crotch seams because it remains strong. However, for the majority of my seams, I have been instructed by my mentors Estela and Christiana, that the whip stitch is the one to use. According to McGann’s sewing guide, this stitch would be used secure raw edges together but raw edges of fabric available in medieval times were manufactured so that the edges would not unravel, unlike today’s fabrics. McGann explains that those of us sewing in the modern mundane world make the mistaken assumption that all garments are constructed in the same manner, whether today or in medieval times. The sewing construction of garments today is based on the use of the modern sewing machine, which requires fabric to lay flat. In medieval times, garments were often sewn directly on the person and seam allowances were also rather narrow. Today our standard seam allowance is 5/8 “, which is wide. With this in mind, I have created my patterns with modern 5/8” seam allowances. For the whip stitch to be used on these patterns, my seams have to be folded down, then sewn on the outside.

As for choice of thread, Kass McGann’s guide talks about wool, linen and silk thread. Although I would like to use the most authentic materials as possible, the availability and cost of these materials makes it difficult for me to choose any of them. In the interest of keeping my project in the very least as natural as possible, I have chosen to use Gutermann 100% cotton thread.

Here is a photo of my very first seam on the green kirtle:


And the project is now underway!

Monday, November 30, 2009

Excuses, Excuses

So...it's been a while...again! But I have good excuses!

My first excuse: My fabric took more time to arrive than I had anticipated. My second excuse: I seemed to come down with that dreaded Swine (H1N1) Flu! For anyone who has had it, it packs a punch!

However, while waiting for my fabric, and before contracting the flu, I decided I couldn't sit around and do nothing. I knew I had an event I wanted to attend on November 28th (Herne the Hunter) and I was not happy with any of my attempts at outfits thus far. As you may recall, I have only been in the SCA for a few months and have been through a LOT of education!

I had a brown dress I had made for previous events, but I wasn't happy with it. It had "princess seams" which I was told wasn't correct for my 14th Century persona by my mentor, Estela. Aside from that, it didn't fit as well as I thought it did when I first made it. So, I decided this was the perfect opportunity to try out my new fitted kirtle pattern for real. Making the kirtle by machine out of good fabric would help me work out any last minute "bugs" before using the pattern for my hand sewing project.

This turned out to be a fabulous idea. Not only did I find out that I needed to take in the seams just a little more at the sides than they had been on my "mock-up", but I also had the opportunity to learn how to sew the eyelets. I had only ever done buttonholes on machine. I have never done eyelets before, probably because they would need to be done by hand! So, I received some instruction from my mentor, Christiana, and I was on my way! Here are some pictures of my very first and second practice eyelets...I think I improved greatly on the second one!:


And here are a couple of photos of the eyelets on my new brown kirtle along with a good view of the fit. The eyelets were definitely a good thing to work on while I was sitting around trying to recover from the flu! I think I did a pretty good job!


And for the grand finale, here are my "Before" and "After" photos. The look on my face says it all...the second photo of me in my proper 14th Century brown kirtle shows much improvement, I think!

So, now I know my kirtle fits properly I am satisfied that my hand sewing project will be a success.
And I even have the fabric now, so I will be starting asap!

Sunday, October 18, 2009

Period Poncho for the Procrastinating Pilgrim


Okay all,

I've finally made up my mind about my project. I've found what Drachenwald needs is more Clint Eastwood in it, and to promote this, I'm looking for a period poncho.

This is what the Germanic National Museum in Nuremberg gave me. (More pictures and examples of similar garments in Lady Anna's Flickr album)

This looks like two rectangular strips of cloth connected along the top. I feel this meets my level of sewing expertise, though the joint on the top may prove tricky for me.

The interesting part of this poncho/cloak is, that it's buttoned up on the shoulders. Both examples I found have this feature, and it looks like the buttoning was always done on both shoulders. Do you guys have any idea about the purpose of the buttons? (Or, more generally, do you know more about this kind of cloak? For example, what's it called? "Blanket"?) It seems unnecessary (provided the neckhole is big enough to stick your head through as is) and to serve only to weaken the arrangement.

Being the ever-resourceful outdoor enthusiast, I figured this might be a dual-purpose cloak, much in the way modern army ponchos can be rebuttoned to be used as sleeping bag covers. Namely, assume the the cloak is made of two strips of cloth, each being about one meter wide and one meter 30 centimeters or such long. (That's roughly 3' by 4' for you nonmetrics out there.) Buttoned together along the narrow edge, it serves as a poncho with the head sticking out on the narrow edge, as shown in the picture. But if you unbutton it there and rebutton it along one of the long edges, you can turn it into a fairly comfortable blanket sized 200cm x 130cm. Unfortunately, none of the pictures I could find as yet shows any buttons or buttonholes along the long edges, which might serve to blow my theory right out of the water.

Now, do you have any ideas about this cloak? Is such a dual-purpose documented, conceivable, fancyful or rightout ridiculous?

What material would be used for the cloak? Is it what we nowadays would call "a hardshell", intended to stop the wind and rain (to which purpose I would make it from cotton tarp), or is it wool?

Any advice and suggestions welcome,

Agilmar

P.S.: If you think this poncho isn't worthwhile, my plan B project is to reproduce the Bayeux Tapestry in braille.

Sunday, October 11, 2009

All Caught Up!


End of September 2009: Revisiting the Surcoat Pattern and Formally Entering the Challenge!

Yes, it actually took me this long to actually get around to contacting the person who was in charge of the First Time Hand Sewing Challenge! But as of September 29th I joined and after this particular post I will be all caught up on my progress.

The end of September was the time I decided to revisit my pattern for the surcoat. As you know, I had developed a pattern previously which I thought was good enough, but looking at it after having left it for a couple of months I felt it needed more work.

I think the shape of the neckline was fairly decent in comparison to the picture in the Codex Manesse plate. The armholes, however, seemed perhaps slightly too open. And my biggest problem was the lack of fullness in the skirt.

Although the Reconstructing History pattern for the surcoat was not the design I wanted due to the openness of the armholes I thought I would take a look at it anyway to see if there was anything that could be of help to me. I was happy to find that there was something I hadn’t thought of when making the surcoat in August. Gores! In the Reconstructing History pattern there are two gores inset at the side seams of the surcoat. Of course this would create more fullness!

I then took the mock up result of the surcoat I had made back in August and took it apart. I adjusted the armholes and then compared its shape to the Reconstructing History surcoat pattern to determine where I would place the gores. At this point I was starting to run out of scrap material to use for making mock ups so I ended up having to use different colours and even then the length of some of the pieces were going to be a little off. You’ll notice some of the gores in the photos will be white as opposed to a wine colour for the rest of the surcoat...which is actually kind of helpful to see where the fullness is added. The first attempt included gores at the side seams only. After trying the result on I was still disappointed with the fullness. At this point I decided to cut up the front and back to inset gores there as well. Once I did this and tried on the result I was much happier. I then created some armhole facing to see how the armholes would fit as well. The result of that is what you see in the photos. I did not put a neck facing on since that will be something I can play with when I do the real thing, considering that the neckline has a different colour trim on it in the plate picture.

And as I did with the kirtle pattern I have done with the surcoat pattern, making it into a paper pattern.

Now all I have to do is wait for my fabric to arrive and I can begin on the actual garments! I can’t wait!

Tuesday, October 6, 2009

More Catching Up

Further journal entries:

September 2009: Lots of Conclusions!
After months of looking for fabric I was becoming impatient and frustrated. I went to a baronial fight practice to discuss my dismay with some of the members of my house, the Golden Oak Inn. As a result, my sewing mentors, Estela and Honourable Lady Christiana inghen Mec-Bead (Tina Oliver in the mundane world…henceforth to be known as Christiana) suggested that making my outfit completely out of linen was not out of the question. Since I was having problems finding 100% wool in the colours I wanted and linen was at least a period fabric, it was completely fine for me to use that fabric. After an educational outing to the fabric store for one last look for appropriate wool fabric with some of the house members, I was shown the online source for linen that Estela and Christiana used. Seeing the colours available to me, I finally decided linen was the way to go.

At the time I had also discussed the type of thread I should use and again Estela and Christiana told me that as long as I used a good quality thread such as Gutermann that I should be fine.

So I have now come to the conclusion that the entire outfit would be made of linen and stitched with Gutermann thread!

During the same fight practice meeting I was also instructed on the proper layers of clothing that I should be wearing as a 14th Century woman (approximately, since I am still working on this and being educated). This was a subject that has confused me since joining the SCA. As I had mentioned in the beginning, I knew NOTHING! I had thought that I would simply be able to wear a bra, a dress and a surcoat if I wished. This, I found out from Estela and Christiana, is not the case. I don’t know about anyone else who has attempted to do research on historical clothing in this period with no prior knowledge, but I find it very difficult to decipher information from various sources, since many would use the same terminology for different pieces of clothing.

In the book “The Medieval Tailor’s Assistant” (borrowed from Estela, thank you!) in the page displaying the timeline for the garments and their periods, the author lists such garments as the simple cote, finer cote, close-fitting cote, kirtle, waisted kirtle, cotehardie, overkirtles, gowns, and frocks/coats. However, in the written information in the pages following the timeline it doesn’t seem to portray each and every piece of clothing listed in a different way. Although helpful, I found some of this information to be confusing.

In the information that accompanies the Reconstructing History Kirtle pattern by Kass McGann that I have since decided to use for the green dress, she discusses the terminology of kirtles and cotes concluding that it is possible that the kirtle and cote may have been the same garment depending on the country from which it came.

After long discussion with Estela and Christiana, based on a 14th Century persona (approximately), I should be wearing a shift/chemise, then a kirtle (laced up the front), then a cote/cotehardie (buttoned or laced up the front) and then a surcoat if I wished. From what I understand, the shift/chemise acts as underwear with the kirtle acting as a bra/slip, the cote/cotehardie being the actual dress and the surcoat an extra fashion layer. I had thought that the kirtle could be worn as the dress but Estela and Christiana said that would not be proper since a woman would never show so much of her undergarments. After long discussion while viewing the Codex Manesse plate from which I wanted to create my outfit we came to a conclusion. Since it seems that the surcoat the woman is wearing is rather closed at the sides in comparison to the later period sideless surcoats, and therefore covering the green layer very well, we decided that it would be fine for me to simply wear a shift/chemise, then a kirtle (in the green colour) and then the surcoat (in the red colour). I would not need to make a cote/cotehardie layer since the surcoat covers the green garment almost completely, which would not be improper.

Therefore my outfit will consist of a shift/chemise, a kirtle, and a surcoat.

Style:
As for the actual style involved in each of the garments I have decided to go with what I can see in the picture itself.

The shift/chemise is obviously not seen. I will therefore not be hand sewing this layer so I can concentrate on the next two layers.

As I had mentioned earlier, I had decided to use a Reconstructing History Pattern for the kirtle. This pattern was chosen after trying out a McCall’s pattern for earlier dresses that I have since found that are not period. Estela informed me that the dress in the McCall’s pattern has “princess” seams which are not present in the period I am representing. Estela directed me to the website for the Reconstructing History patterns since Kass McGann, the person who has developed these patterns, has done much research in the area of historical clothing and if I was going to use a purchased pattern rather than developing my own, I should go here. I purchased the pattern package for the 14th Century Woman since that is the period I am working in.

When I look at the woman in the Codex Manesse plate, the only things that are visible in the picture for the green kirtle are the sleeves. I do not see the neckline or whether or not the garment has a closure at the front and if it does have a closure, what the closure would be. I also do not see how tightly the garment is fitting. The sleeves that I do see seem to be tapered, although they may look a little loose. There also seems to be a trim of some sort at the end of the sleeves in a gold colour with a very slight trim of red on the very edge. I do not see any buttons on the sleeves at all. With all this said, since I have decided to make the green garment into a kirtle, I am going to make it tight fitting, with a laced closure at the front, and tapered, fairly tight fitting sleeves with no buttons. I will leave enough give on the sleeves to be able to add the trim at the ends.

For the surcoat, in the Codex Manesse plate I can see that it is very voluminous with fabric dripping onto the floor. Although sideless, the surcoat is very closed at the sides, leaving little or no visual access to the green garment under it. There seems to be a trim on the neckline of the surcoat which matches the trim on the sleeves of the green garment. The neckline also seems to cover the green garment completely, leaving no visual access to the green garment here. With all this said, although I do have a pattern for a sideless surcoat in the Reconstructing History 14th Century Woman package, the pattern is for a very open sideless surcoat. Obviously I cannot use this pattern the way it is. As I have mentioned in earlier documentation, I have been working on developing my own pattern for the surcoat in the Codex Manesse plate. I had made numerous adjustments to a commercial pattern for a surcoat and had developed a pattern. I had used this pattern for making a surcoat for an outfit I needed for an event at the end of August 2009. Thinking back on it and the results of the garment, I think I want to further develop this pattern because I do not believe the surcoat pattern I made is either long enough or has enough volume. I may include gores in further patterns. As well, I may take a look at the Reconstructing History surcoat pattern to see how it is constructed.

Late September 2009: Working on the Kirtle Pattern

I finally started work on the pattern for the kirtle! As I have said, I used the Reconstructing History pattern for a 14th Century Woman Kirtle. My plan here was to use very light weight white poly/cotton broadcloth to make the kirtle by machine so I could draft a pattern for the kirtle to fit my body measurements as closely as possible. This way I have a kirtle pattern I can use over and over again and it also saves me a lot of fitting and refitting with the hand sewn garment. I would rather spend my time hand sewing!

This is the first pattern that I have ever used that was not a McCalls/Simplicity/Butterick commercial pattern. I noticed a marked difference between the commercial patterns compared to this historical clothing pattern. I found that there were not as many step by step instructions as well as a lot less diagrams to help figure out how to construct the pattern. My personal opinion is that one definitely needs prior sewing experience, especially clothing making experience, in order to be able to work with this pattern. I did, however, appreciate the historical information accompanying the pattern. There was a lot of useful information compiled that is difficult to find when researching period clothing on your own. I also appreciated how the pattern developer instructs the sewer to start with the size that matches your body as close as possible but to then modify the pattern to fit, with further fitting instructions once the fabric has been cut from the pattern.

I think I did fairly well with it, although I had a couple of frustrating experiences.

My first frustrating experience was fitting the pattern to my body once I cut it. I have never done this with a pattern to the extent that I did with this one, mainly since I want the kirtle to fit as close to my body as possible. When it came time to do the fitting for the bodice area I was alone in the house so I had to do it myself. It is a very difficult thing to do by oneself! I think I went back and forth with pins and loose machine stitching about 10 times before I finally got it to a point that suited me! The fit, I believe, is almost right…I would like the bodice to fit more tightly on the real thing, but my mentor, Estela, advised me that fitting can be different for each outfit you make, depending on the fabric you use. I also want to lower the neckline. I have my mock up fitting fairly well so I can go from there.

The second frustrating experience was with the sleeves. Because of the lack of instructions in the pattern regarding how to fit the pieces together I found it VERY difficult to figure out which sleeve was the left one and which was the right one. The pattern included either a separate gore piece or the option for the gore to be included in the whole sleeve piece. I chose the included gore for simplicity. I don’t think it would have made much of a difference in trying to figure out which sleeve went where, though. I really wish there were more diagrams in the pattern. What made it even more difficult was the fact that the sleeve was going to need “easing” into the armhole. This made it even more confusing in trying to decide where things should be pinned. So I had to figure it all out by trial and error, going back and forth a few times as I had done with the fitting of the bodice. I almost ran away screaming a times but I am proud to say I persisted until I finally got the sleeves to a satisfactory fit.

The only other problem I had was with the length of the dress, but that would be easily changed by adding a few inches.

In the photos of the mock up you can see how I have managed to get it to fit pretty well. On the real thing I will likely take in the waistline to tighten the area under the bust line, but I didn’t want to cut away too much fabric! I will also definitely be lowering the neckline. And look! I managed to get the sleeves on the right arms!

Once I finally got the mock up to fit the way I wanted I proceeded to make it into a pattern. I did this by first marking the seams on all sides of the mock up with permanent ink. This way when I took it all apart I could easily see where I should be drawing the pattern, measuring 5/8ths of an inch from the seam. I used a roll of packing paper to mark out the pattern. I made sure to leave markings at various points where I wanted the gores to be inserted and where the sleeves should go…showing left and right sides! When I finally get to cut out the real thing it won’t take me forever to do it. And I can also be assured that, for the most part, all my hand sewing will not have to be completely pulled out for fitting purposes.

Sunday, October 4, 2009

Catching Up

Hello again!

As I said in my last post I have been working on my project even though I took so long to join the challenge and write my first post. So here I'm going to start trying to catch up. I've been keeping a journal on my desktop about my project so I'm going to cut and paste from there. I have written quite a lot so I will only cut and paste a little at a time:

Early July 2009: A Bad Experience with Hot Water and a Dryer

After some initial research I decided that the fabric for the outfit would be made from wool. I was happy to find some red wool fabric at my local fabric store that would be perfect for the surcoat. There was only a limited amount of it but considering how much fabric I had needed for a previously machine made surcoat I believed it would be enough. Because the fabric was very loose in its weave I was instructed by one of my sewing mentors, Baronne Estela du Frayse (Kelly Grant in the mundane world…henceforth to be known as Estela), that I should “full” it by washing it in hot water and drying it in the dryer. I was aghast when doing this resulted in extensive shrinking! Alas, there was not going to be enough fabric for the project!

Mid July 2009: Research

I went to a local branch of our library in Halifax to do some research in the reference section. In the book, “Survey of Historic Costume”, Chapter 6: High Middle Ages: 900-1300 it describes fabric manufacture. Available fabrics during this time would have been wool, linen and silk. With this information I decided that using wool would be fine.

I also did some research online and found this quote from a book called “Science and Technology in Medieval European Life” by Jeffrey R. Wigelsworth: Under “Clothes and Cloth Making” found in (I believe) “Chapter I: Earning a Living: Agriculture and Manufacturing”: “Most everyday medieval fabrics were wool or linen…” and “The warmth of wool made it a natural choice for outerwear, while linen cloth was used to make underwear.” From this quote I again concluded that I would use wool.

From the same chapter and section of the online copy of “Science and Technology in Medieval European Life” as mentioned above I also found quoted: “Sewing thread used in medieval clothing was made from linen. On more expensive pieces of clothing, the thread was silk…” From this quote I concluded that the thread I would want to use was linen.


August 2009: Beginning the Design for the Surcoat

The time had come to start thinking of the design for the pieces of the outfit. I had made a dress from a McCall’s pattern in the past that seemed to fit me rather well so I thought this dress pattern might be appropriate for the outfit. It was laced up at the back, though, which I had discovered was incorrect for period garments. I decided, then, that I might be able to make it with no lacing at all. I tried it out on a brown dress I would be wearing to an event at the end of the month and was happy with the results. I decided that this was probably going to be the pattern I would use for the gown.

For the surcoat I decided to design one that I could make and wear at the same event as I would use the brown dress. I thought I could try modifying a surcoat from the same McCall’s pattern where the dress came from. I had made a surcoat from this pattern in the past and thought it might give me a good start. The pattern, however, was for a rather open sideless surcoat. The one in the Codex Manesse plate is much more closed at the sides as well as at the neckline.

I started off making my own pattern for the surcoat by laying out the original one I had made from the McCall’s pattern on brown paper and tracing out the pattern, making modifications for the armholes and neckline. I then cut out my mock up pattern from some scrap fabric and sewed it together. The result was not exactly what I wanted. The neckline didn’t seem to lie properly as it bunched out somewhat. Also, the bust line seemed to be a little tight. I took it apart and modified it further. I didn’t have too much of a problem with the bust line but it took a few attempts to get the neck line to sit properly. I finally found a design that seemed to fit well enough so I used that pattern for the surcoat I would wear to the event at the end of the month. I was happy enough with the result although I was a little disappointed with the fullness of it. The result was produced from rather heavy fabric, which I thought may be the problem. However, I didn’t have much more time before the event to try to modify it so I left it as it was.


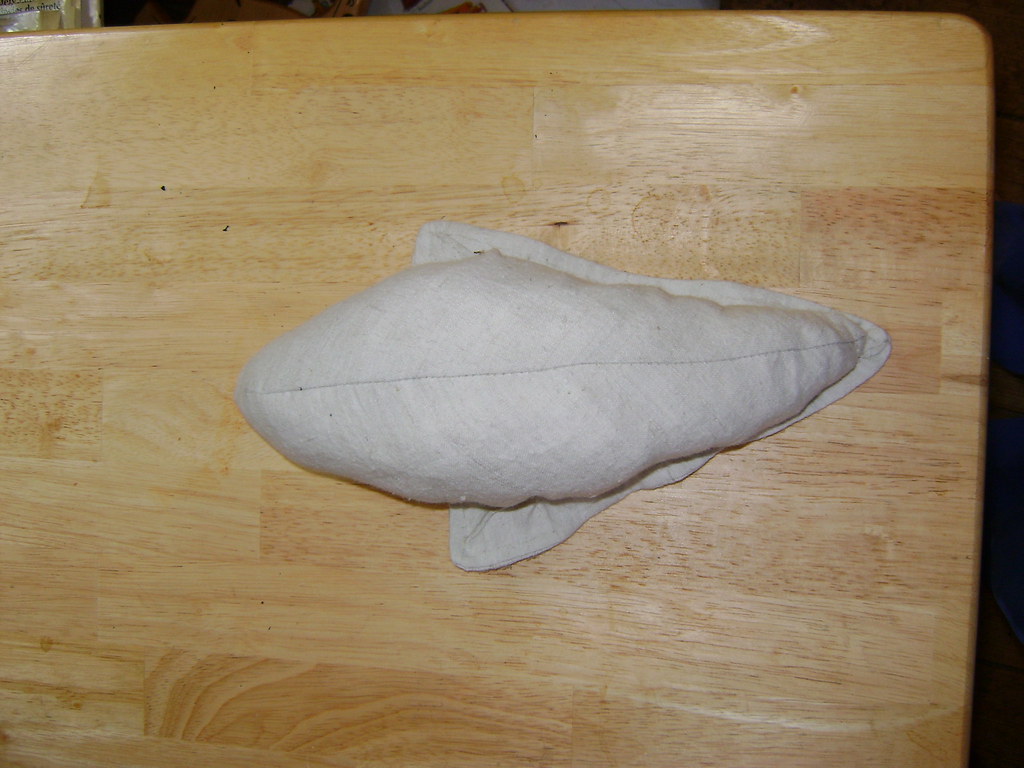
The first photo shows my first attempt. You can see where the neckline is puffing out and how the bustline is a little tight.


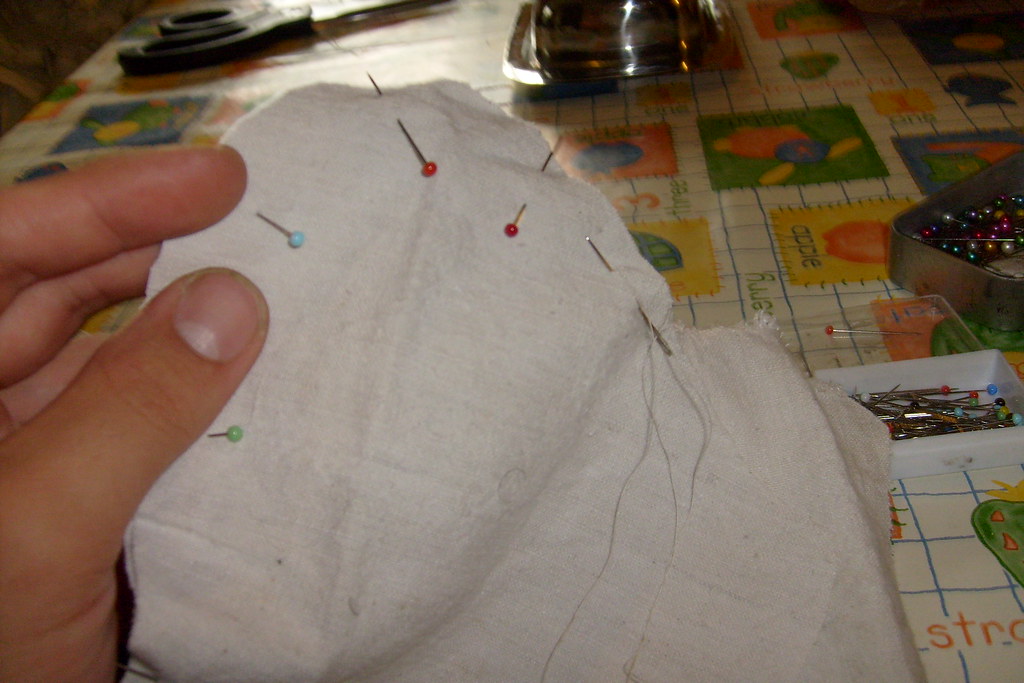
The second photo shows how I adjusted the neckline so it would lay better and how I made the bustline less tight.


The third photo shows the result of the outfit I used for the August event including the brown dress and the surcoat.
I'll let you digest all this before adding any more...there's still lots to catch up on!


Finished Apron


Finished the Arpon with blackworked "Fret of Thistles"


Sometime I will add more blackwork, but not today.


Now on to next handsewn project.


Thank you for this challenge, I've had a lot of fun with it.


Pet

Tuesday, September 29, 2009

Greetings From East Kingdom!

Greetings Everyone! I am Isolda Fairamay of the Southern Shores, from the Barony of Ruantallan in the East Kingdom.

I am very new to the SCA, having only been a member for a few months. I heard about this wonderful challenge and thought it would be a perfect project for me.

To give you a little background, I have been sewing by machine for about 20 years, but I do not consider myself a seamstress by any stretch of the imagination. I started off using mundane clothing patterns years ago but alas I became bored and moved on to more crafty projects. These crafty projects lead me into what has been my major pastime for a number of years...fabric art. Specifically I have created many quilted fabric art wall hangings. They are all my own designs and I have enjoyed making them immensely. Although I have had lots of sewing experience I must point out that I have no formal training. In fact, I have always been rather independant in my sewing by trying things out on my own and doing what works for me rather than following rules. I must also point out that I have done all this almost exclusively by machine sewing. I would avoid hand sewing anything (for lack of a better term) like the plague!
So, why this challenge and why now?

Well, of course once I joined the SCA I realized that I would have to sew my own clothing to wear. I always thought I hated sewing clothing and I gave up doing that a long time ago. But once I started sewing some medieval clothing and learning about it I found I started to enjoy it. The clothing itself is art and it is feeding my creativity in a way I haven't felt for a long time. SO, when I heard about the First-time Handsewing Challenge I knew it would be perfect for me! What better way to immerse myself in the art of sewing a medieval garment than to make it all by hand myself? And being someone who believes herself to be a hater of hand sewing, this is a challenge I cannot pass up!

What to sew?

As soon as I decided I would join this challenge I knew exactly what I would make. When I was first doing some research on what time period my persona would represent I saw a picture of an illumination that I fell in love with. It is one of the plates from the Codex Manesse, an illuminated manuscript from the 14th Century. I think the outfit that the lady in the picture is wearing is beautiful. I will post a photo of it with this entry.


Now, as I said I am rather new to the SCA and am still learning, but this is my plan for this First-time Handsewing Challenge: My goal is to recreate the lady's gown and surcoat in the chosen plate depicted from the Codex Manesse illuminated manuscript as authentically as possible.

I hope you all don't mind me joining the challenge a little late...I've been rather busy over the summer and did not get around to contacting anyone about it until now! I HAVE been working on this project, but since I haven't yet begun doing the hand sewing itself I decided joining late was better than never!

Looking forward to more posts!

Monday, August 24, 2009

the first codpiece finished

Greetings all
Well I finished the Codpiece!
It is not quite what I was going for, but as you already know from my last post I LIKE IT!
Ok so I toke the lining (see last post) and I attached the silk after I had gathered it to the right length to the "swollen" part of the codpiece.
The outer part was made slashed and the slashing turned and sewn down, then the separate parts (the same as the lining) where sewn together. All this was then turned and pulled over the Lining with the Silk attached and then blind stitched closed.
outerpart codpiece

me at pennsic

me

Gottfried

Monday, August 10, 2009

My Handsewing on Apron


I've finished the hand sewing!!! Now to iron it, ha ha. Should have done that before the pictures.
Now I will be sewing blackwork on the bottom. A fret of Thistels is the pattern I'm going to do.

Sunday, July 26, 2009

Ok, I've talked to several people and I will start simple. I'm going to make an apron for my German dress.
I'm digging in my linen boxes to see what color I will use. I also want to do blackwork on it.
This will be fun.
Pet

Saturday, July 11, 2009

codpiece continued

Ok So here is how far I am.
Linen Cod piece
as always all the pictures can be seen at
http://www.flickr.com/photos/77086627@N00/sets/72157619995383885/
As one can see the linen inside part is done.
Disappointingly it did not quite turn out the way I wanted. I know what I would have had to do different to get the look that I wanted.
This happens to me every time I make a Codpiece. You think I would remember it, but nooooooo. The next time I pattern out a codpiece (it would help if I didn't always loos the patterns for my codpieces) I do the same dame mistake I always make and think "hay isn't this the part I mess up and need to do different...........??????................. neaaaaaa thats later on"
And then happens what happens every time I think the codpiece is not soooo bad and actually it looks pretty cool like that and well they did have this shape........... bla bla bla............
So this is wat It will look like with loots of slashings.

Gottfried

Friday, June 26, 2009

Handsewing tip of the week (#4)

Why doesn't the back look as good as the front?

One of my biggest problems when I was learning how to handsew is that, while the front looked more or less ok, the back was a mess. It took me a while to figure out how to fix this.
One reason this happens, is that your needle is going in at a diagonal and not straight up. If you are doing your running stitch one stitch at a time (needle down, pull, needle up, pull) it helps if you check the back every time you make a stitch at first, to train your hand to put them in the right place. Another way to fix this is (if your fabric is thin enough to allow it) is to make one whole stitch in one go (down up, pull). With this, you really need to watch not only the length of the stitch, but the length of the negative space between the stitches, as this is your stitch on the back.
Now, if it's just a matter of some stitches being longer than others, you can always cover it up with a flat-fell seam. Uneven stitches running diagonally to the seam can affect the way the garment sits and falls, though. I know it's frustrating, but don't hesitate to take out part of a seam and re-do it! You'll be happier in the long run.

Tuesday, June 23, 2009

Still no second piece

I have not been working on the second piece and that may be a good thing. A friend, with whom I discussed at length that the secrets of sewing lies often in the order of assemblance, has told me to try and sew the joining of the leg part to the upper foot part first. I will try that, alas, I have also found some other pictures.
These are fancy and purportedly women's hosen
But frankly I doubt it, because the site linking to it was englishspeaking and the notes underneath the sock says that this is an exhibit of a Dommuseum, a clerical museum, and it would seem awfully frivolous for that. also the note gives no indication of this being a lady's garnment. What is an interesting detail ,though, is the upper right corner of the stocking in the picture.

Now this picture is rather straightforward and it does show black hosen on the lady:
and another picture of a woman getting raped ... but she is wearing socks
Elisande

Monday, June 22, 2009

For the German Participants

Just a heads up that Karstadt is selling wonderful raw silk, 90 cm wide, in all colors, for 8 euro a meter (if you need some for your project)

Sunday, June 21, 2009


Greetings from fair Atlantia!
I have decided to accept (with some trepidation) Lord Gottfried's challenge.
I'm making a coif...but first I have to embroider it. I haven't written the documentation down yet...but hopefully I can get to that this week.
Isabel of Tir-y-Don

Gottfrieds codpiece starts

Hi all
Well I have been very lax lately in getting my project started, but it is on its way now
So that I don't take up to much room I will only be posting one picture here but the rest can bee seen till the end of the challenge at:

http://www.flickr.com/photos/77086627@N00/sets/72157619995383885/

So what I have done is made the pattern for the codpiece this will be cut out of linen and the wool.
The silk will stay like it is an attached to the linen once the linen and wool parts are sewn together.
Right now I am sewing the Linen parts together. Once that is done it will be stuffed as hard as I can with scraps I have left from other sewing projects. Then sew the last bit shut. After that I plan to throw it in the washer to mat it down as much as possible and stuff it some more.
Once the Wool part is sewn and the silk has been attached to the Linen part, the linen part (with the silk attached) will be put in the wool codpiece.
Here a picture of me working on the linen part
S6300671

Gottfried

Friday, June 19, 2009

A Huzzah to you all

Well I Just wanted to say a BIG thank you to all of our challengers.
I must say that I have been impressed on many levels with everyone's attention to detail and the grate help that you are giving each other.
I think it is really grate that you have been trying to get your projects as accurate as you can, and it is really inspiring to see all these wonderful projects, especially for my lazy but.
I would really like to say thank you to all of are sewing help instructors for all of the help you have provided, especially to Maestra Anya for her wonderful Hand sewing tips of the Week.
Also I would like to say a big sorry for being lax with getting my project up and going I will get on that this weekend.

thanks again for all the support for this Challenge

Gottfried

Thursday, June 18, 2009

Handsewing tip of the week (#3)

Dealing with knots:

Ok, so you're sewing, things are going well, and then you get a knot in your thread. Here are some tips for dealing with the pesky little buggers:

1. Avoid them all together: As you sew, your thread will begin to twist. This makes the thread knot. To fix this problem, every so often, let go of your needle and let it hang by the thread. This will allow it to un-twist itself, which will, in turn minimize your knots.

2. The simple knot: the most common knot you'll get is also the easiest to deal with. First of all, *be gentle!!!!* pulling tightly at a knot is the easiest way to make it stronger!!! Simply put your needle through the loop and gently tug at one thread. If that doesn't straighten it out, keep the needle in place and gently tug at the other thread. Nine times out of ten, it will unravel itself. Never tug at it or you will end up with an impossible knot!

3. Freaky knots: Every so often you'll end up with a bizarre knot of sorts with several knots all wrapped around themselves. Use the principle of point two. Choose a loop, and follow procedure 2. If that doesn't work, ease your needle into another loop and try again.

4. Twisty end knots: Sometimes the loose end of the thread will knot itself around the main thread. This is not cool. The best way to handle such knots is to run the knot up to the eye of the needle, cut the thread just below it, and rethread.

It's hard to describe these techniques, so if anyone is interested, I'll take photos of knots as I get them and photos of me getting them out...so, uh, is anyone interested?

Wednesday, June 17, 2009

Greetings from fair Northshield.

Merouda Pendray sends greetings unto those who shall receive these letters patent.

First, I took a quick picture of my favorite showing of the stockings for Elisande:

The picture: Jezebel being devoured by dogs from the History Bible of Evert van Soudenbalch, Utrecht, c. 1460.


The colors are close, but if you pay attention, you'll note the stockings are a carnation color and the flesh tone is... well.. flesh tone.

As for what I should like to sew....

I have always had the desire to do a skin out outfit by hand, but I doubt that I shall be able to do so in space of a year, unless I choose to give up all other projects. That is not going to happen.

I do hope to get a linen dress done, but I will be starting with a woman's cap, based on the research presented here. One of my most loved (and least flattering, alas!) outfits is a 13th c. dress/underdress set given to me by my apprentice, and, while I am a big proponant of proper headgear, I have never liked the 13th c. veil with the set. I prefer the dress of the late 15th and early to mid 16th c., and this cap will do well to serve the clothing of my era and yet complement the clothing gifted to me. :-)

Anya was so kind to help me with a couple of additional links to suport the idea that women were indeed wearing Hosen.
This is a biblical scene and the lady in the middle is wearing green hosen. They seem to have some form of pattern.

There is another picture out of the Trés Riches Heurs du Duc de Berry. February you can see it here: http://historymedren.about.com/od/booksofhours/ig/Tr-s-Riches-Heures/February---Tr-s-Riches-Heures.htm

It is quite possible that also the lady in the front is revealing her hosen, but the coloring is so close to skin tone that I did not consider it a definite. Anya drew my attention to the lady in the back of teh shed. There you can clearly see the hem of the hosen, the color of which is indeed the same as the legs of the lady in the front.

Appenrently there is also written evidence as Henry the VIII aparently ordered silken hosen for his sister. But that is a second hand statement. I have not been able to verify this, so far.

Friday, June 12, 2009

Handsewing tip of the Week (#2)

Making eylets easier!

Eyelets and buttonholes can be a bit scary, but a few steps can make them look better and last longer!

1. Space them from 3/4ths of an inch to an inch apart. This is near enough that there aren't any crazy gaps, but far enough away that you don't end up spending the rest of your life working on one dress :-D

2. Secure the fabric: This makes your eyelet/buttonhole area stronger and prevents pulling. On either side of where you're putting your eyelets, run a row of running stitch:
l 0 l
l 0 l
l 0 l
l 0 l

3. Secure the eyelet: before sewing the eyelet, stitch around where the eyelet will be with a running stitch. This helps prevent slippage.

4. Use silk cording or buttonhole cord for stronger eyelets, or use the threads unravelled from the same fabric as the garment to make "invisible" stitching on your eyelets.

the first part


this is the first sock

I started by making a mock up in a different fabric. then i cut out the pattern I made. I started by putting the pattern together with a broad running stitch.


then, using tiny backstitch, I sewed it all together.

I finished the seams carefully, using the *fold it over and pin it down* method

Thursday, June 11, 2009

Petronilla's Handsewing Project

Greetings from my Kingdom of Artemisia,
I am Baroness Petronilla from the Shire of Twae Linnes. I'm apprenticed to Mistress Duchess Albreda.
I've been taking some classes on hand sewing over the past year and have planed some projects to attempt.
When I saw your First Time Handsewing Challenge I've become more inclined to start a project now. As I'm preparing for Uprising next week I will confer with those who do handsewing at the event and then select a project.
Thank you Gottfried for arranging this challenge.
Petronilla

Accepting Gottfried's challenge

Greetings all, from the Barony of the Cleftlands in the fairest Kingdom of the Midrealm. I have sewn many things with machines, and an occassional seam or repair by hand, but never completed a whole item by hand. I am still undecided as to my selection, though it will be something from the 14th century English area. If I don't panic I may try a silk jupon lined in linen similar to that found in the effigy of Prince Edward. If I find that too overwhelming I may try a hood, arming cap, or kidney pouch in the same style.
Cheers,
James ap Llewellyn, squire to Sir Gauss Magnusson, loyal subject of the Midrealm

Sunday, June 7, 2009

greetings


Greetings, my name is Alicia Ravenspure from the kingdom of Ealdormere. I thank you for this opportunity for me to try my hand at creating a garment completely by hand. I am an experiences sewer by trade but I have always relied heavily upon the conveyance of the sewing machines. I have made many dresses for my eldest daughter in the past and I have decided to make a dress for my youngest this time. She is two currently but should be almost 4 by the time this is all said and done. The girl in the painting i found looks to be in her early teens so I’m going to scale the dress down for my daughter but keep the rest the same. I hope that that is ok?

Saturday, June 6, 2009

Elisande's Project


My name is Elisande Walters form the shire of Drei Eichen in the fair Kingdom of Drachenwald. Anya was kind enough to let me use her computer today, so I am posting from that IP adress. I have been sewing for a long time but only recently started to do more than just a few stitches by hand. I am as new to handsewing as I am experienced in using all kinds of machine (I even used a hand driven one for a while at my grandma's).I have never ever sewn a complete piece by hand.
I will participate in this challenge by sewing myself a pair of socks. Well, not really socks, but actual short hosen as we think women wore bac then. The picture shows a pair of silk red hosen, which I will try to duplicate as well as my skill allows me.
The picture is a photograph depicting an exhibit at the Palacio real de Madrid. The picture is taken out of the catalog:
"Hose of Rodrigo Ximenez de Rada, 1247 AD, red silk. Source: Vestiduras Ricas: El Monasterio de las Huelgas Y Su Epoca 1170-1340. Exhibition at the Palacio Real de Madrid, June 2005. Patrimonio Nacional."
The hosen were apparently in the possession of on *Rodrigo Ximenez*. A man. I am not sugesting he was a cross dresser but there is no evidence suggesting that women's hosen were cut any differently and I will keep looking for *women's* underwear. I liked that these were not just a *depiction but a photograph of the real thing.

Friday, June 5, 2009

Handsewing tip of the Week

Beeswax is your friend!

When you handsew, especially if you're using linen thread (which tends to break easily), you need to make your thread as strong as possible. The trick is beeswax. Get a big chunk of it and keep it in your sewing kit (you can usually find it at art supply shops). Before you thread your needle, run your thread through the beeswax a few times. I use my thumb to press it down into the wax as I run it through, but find the way that works best for you! Regular candlewax will unfortunately not work...it's gotta be the real deal!
Enjoy!

Tuesday, June 2, 2009

Taking part in this Challenge

I want to make a real handsewn Birka-Viking apron.I will use green,hopefully gark green,wool .I will take the original Birka-founded cut for it. Maybe I can dye the wool for myself...And there will be mediveal stitches all arround to border it,with dark red wool.
I will research to find a picture to show what I'm going to do.

Monday, June 1, 2009

Gottfrieds challenge

Greetings all
Well this is not the first time that I will be hand sewing but since it is my challenge I thought I should join with a project.

So my challenge project will be a codpiece dating from about 1566. My documentation is a colorized Woodcut of a Trabant of Graf Niklas Zrinyi retinue (Landesmuseum Joanneum, Alte Galerie, Inv. Nr. AG 10784-10786). The Picture is taken out of “Imperial Austria: Steirische Kunst- und Waffenschätze aus vier Jahrhunderten” ISBN 3-902095-00-8
codpiece

I plan to use Wool as the outer layer that will be slashed. The stuffing that will be coming out of the slashing will be made of Silk.
The left side of the outer codpiece will be Hunter green, the right side will be lime green and the silk will be exactly reversed.